a year or so ago I acquired a nice old derbyshire cross slide vice from Ebay. It was generally in reasonable shape and the price was right. The whole cross slide was bright with no rust or appreciable age spots but upon closer inspection after receiving it I found that the previous owner had been making small angular adjustments to the top cross slide by tapping on the corners of the fine dovetail bed. This had resulted in a slight mushrooming of the ends of the ways and what must have been a corresponding tightening at the end of the travel for the top slide. I was able to carefully recut, grind and lap the dovetail ways into shape but the top cross slide nut had been fairly ruined by years of being forced to drive the carriage over these too tight ends.
I hunted and hunted for a replacement nut on Ebay with no luck. I live in Rhode Island so I'm not that far from the still existing Derbyshire factory so I contacted them as well. They were super slow to respond (months) and not very helpful in ordering a replacement nut for a long out of production unit. The cost would have been as much as the entire cross slide.
I endeavored to make the little high accuracy nut myself and this was the process to get to some very satisfying results.
Here's a picture of the very sad original cross slide nut. It had been so badly stripped that the previous owner had crushed it to try and regain some thread engagement. Once I examined it, I decided to make it in two parts and silver solder them together. By making the threaded barrel from brass round stock, I could guarantee high accuracy and concentricity.
 |
| Original Derbyshire damaged cross slide nut |
I set about looking to purchase a 12-40 Left hand tap and quickly found that no one carries them. I ordered one custom made from Tapco USA (because I will also be making some other cross slides from scratch). The threaded barrel turned out perfect and fit the lead screw with zero backlash. You can see it here next to the old nut.
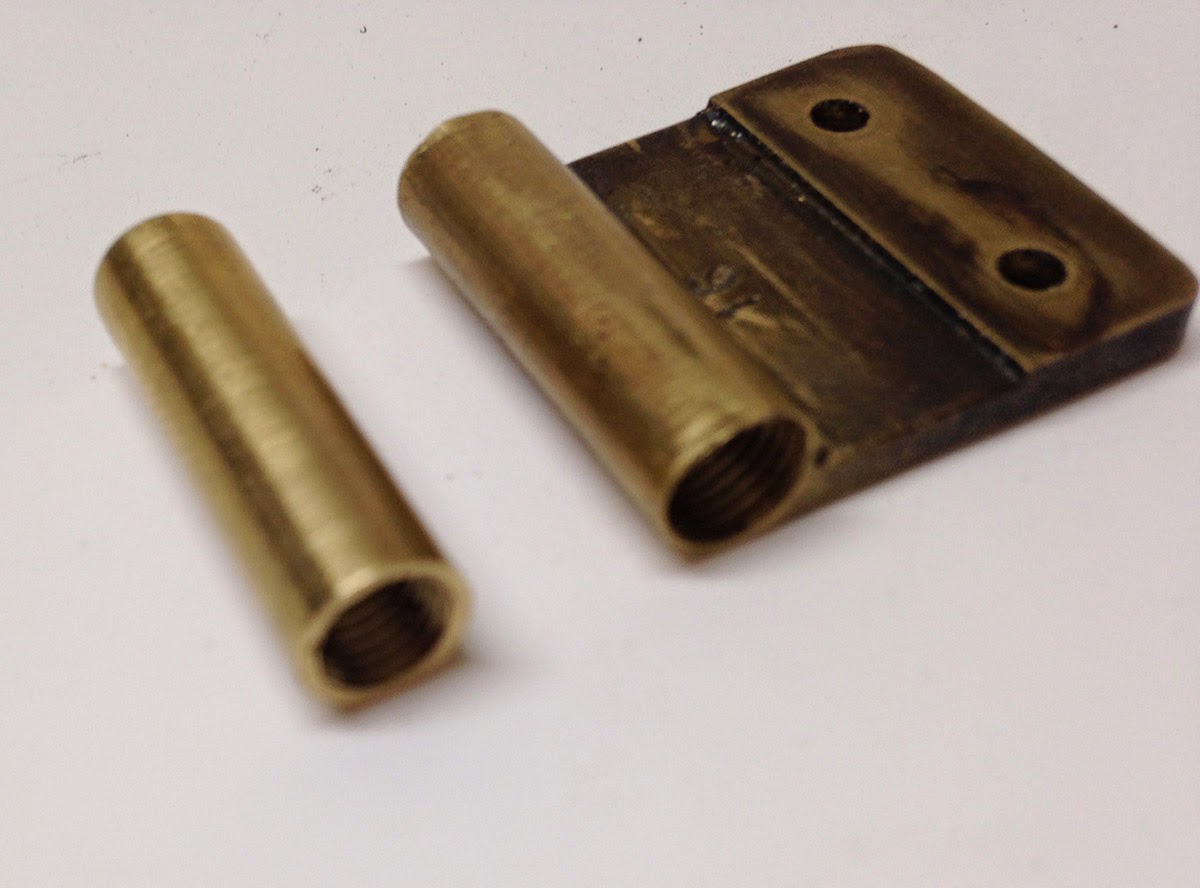 |
| left hand threaded new barrel |
Now it was time to carefully machine the mating tab to accept the 1/4 inch Dia. O.D. Barrel and to do this I brought out the milling vice assembly I made for the vertical slide I have. Below are the images of assembling the milling vice. There are four custom pieces that were needed to make this assembly accurate and stable. There's a full width custom T-nut that also flares at the top to align the vertical slide. It's rock solid. Then there's the rotational adapter that fits on the pivot stud and angular adjustment nuts of the vertical slide. Over top of that is a close tolerance saddle that holds the vice. Finally, the vice (another old Ebay find) fit snugly into the saddle and is drilled to have three positions for gross height adjustment (there's also the full travel of the vertical slide).
 |
| Rotational adaptor for vertical slide |
 |
| Full width T-nut |
 |
| T-nut in place on vertical slide |
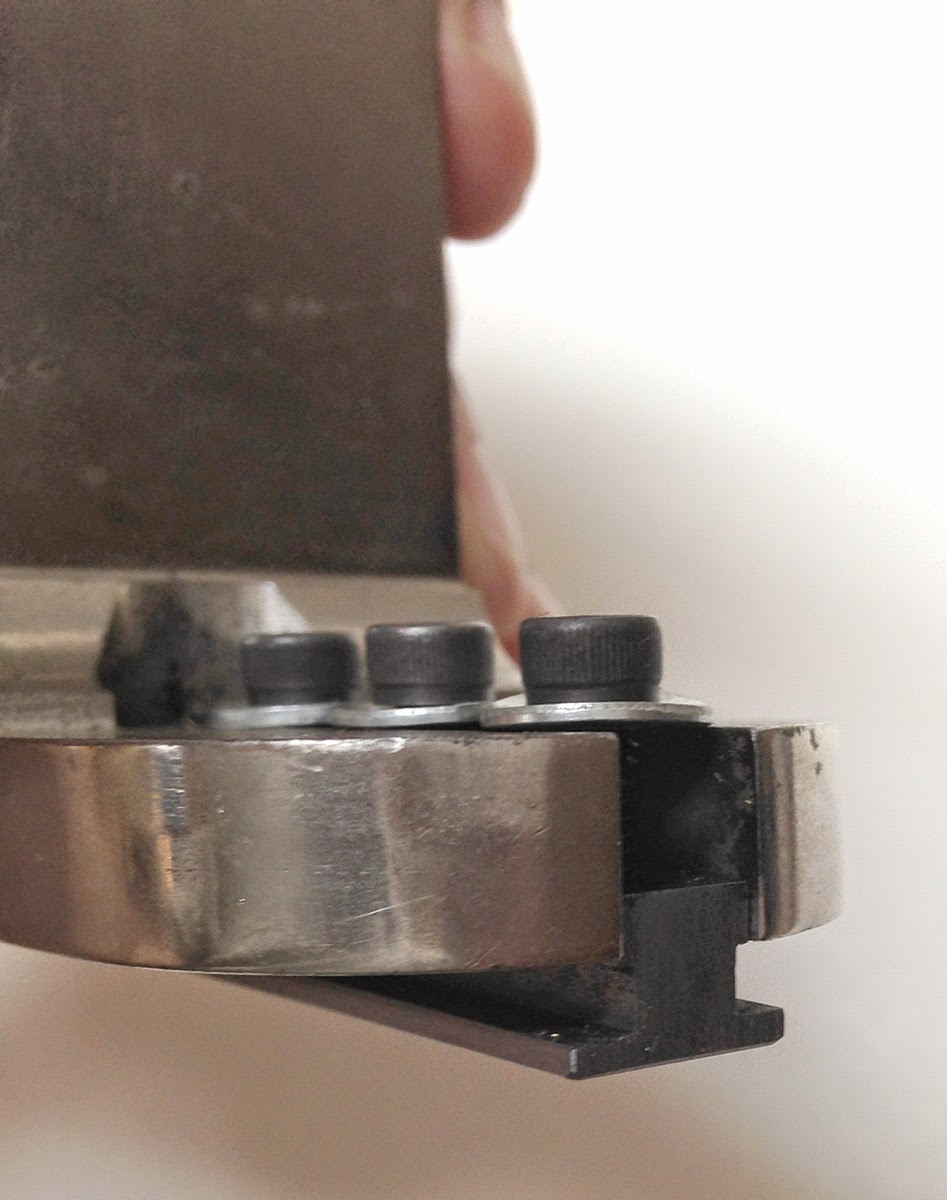
 |
| T-nut snugged down with three cap screws |
 |
| Assembly in place ready for saddle |
 |
| Saddle and low profile cap screws |
 |
| Saddle is close tolerance fit over rotational adapter |
 |
| Bolting down Saddle |
 |
| Milling vice drilled and tapped for saddle |
 |
| Milling vice assembly in place |
 |
| rough cut oversized brass flat stock blank |
 |
| mounting 1/4 inch end mill using steady rest for stability |
 |
| Ready to go |
 |
| 1/4 inch dia. recess matching threaded barrel |
 |
| Great gapless fit ready to solder |
 |
| Pins hold setup in place for soldering |
 |
| Great result after soldering ready to mill to size |
From here it's a simple matter of milling all sides to size and then carefully establishing the critical hole locations. Once completed, a careful installation and a few dozen times running it back and forth and Voila!! I now have a cross slide with virtually no backlash and very smooth operation.
 |
| New nut milled and drilled to exact dimensions |
 |
| Relief added to bottom of nut |
 |
| Shallow relief added to top of nut |
 |
| Installed and ready to go@@ |
Cheers!


Derbyshire has these nuts in stock and answers quickly and they are not expensive
ReplyDelete